Here’s how to install your Bike Bulldog. Watch the demo video and then use the guide below for a simple installation.
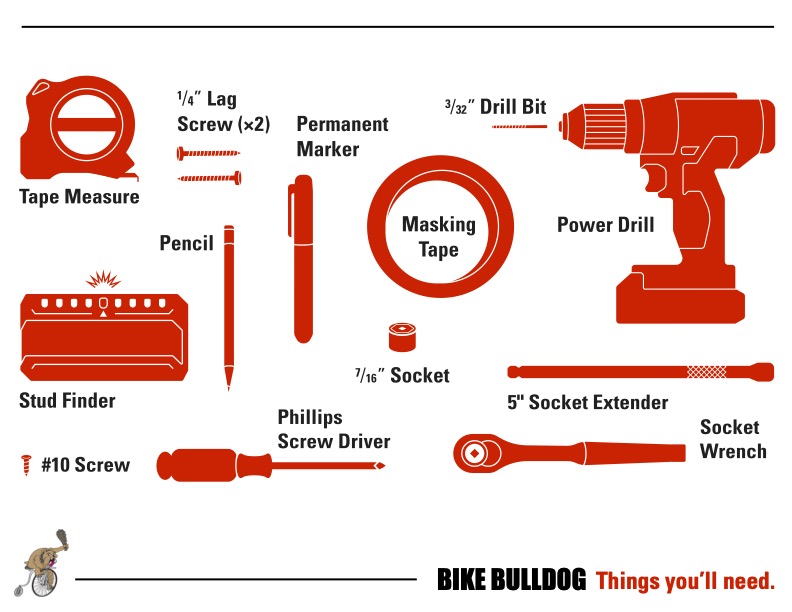
Things You'll Need to Install your Bulldog
Step 1
Locate the stud you will be mounting on. Measure your bike’s cross bar and tape the installation template to the wall using the center line & height of bike cross bar to guide placement . The center line needs to be aligned with the center of the wall stud or other immovable object the Bulldog is being attached to. The center line indicates where the cross bar of the bike will be while cradled in the Bulldogs’ jaws. You must install the unit no lower than the height of the cross bar in order for the bike to fit into the installed Bulldog.
Step 2
Using the 3/16” bit, drill the 3 pilot holes per the template. Then remove the template from the wall.
Step 3
Using the 7/16” socket, install the 2 lag screws into the top two holes until they are have approx. 15/16th of an inch or 5 threads showing. Next install the # 10 Lag screw into the bottom leaving about just short of being fully seated.
Step 4
Then slide the bulldog over the lag screws at a slight angle and slide / lever down. Ensure the #10 screw is inside the bulldog. Then simply tighten the lag screws. Now all that is left is to pull the tape form the battery compartment of the alarm and set the combination to your preferred combo.